

Help: My Subscriptions
Your "My Subscriptions" Page:
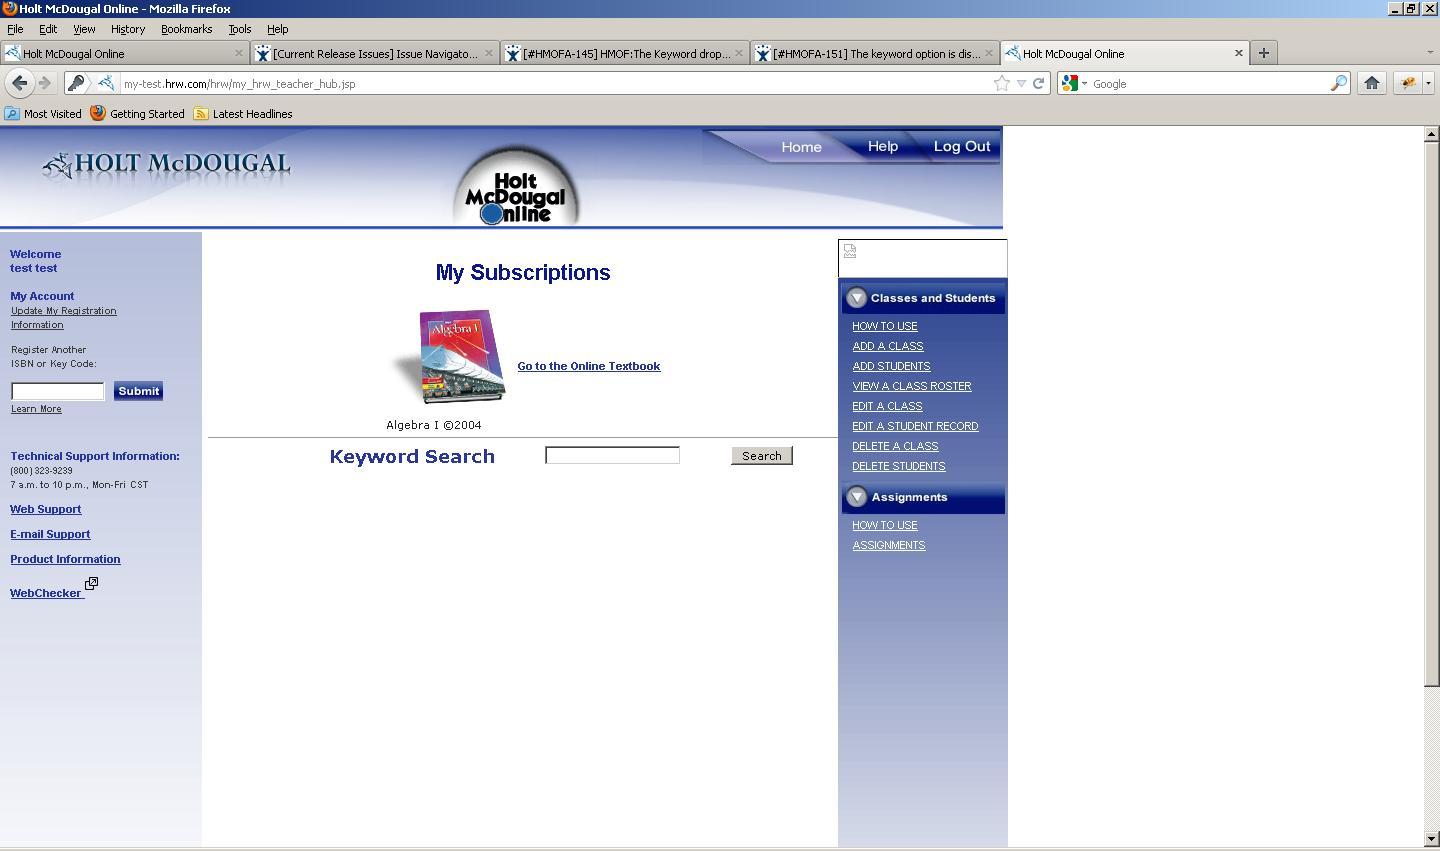
Your personalized Holt McDougal Online Learning My Subscriptions Home Page has three columns organized by the kind of work you’ll do:
Left Column—General Account and Site Information/Links
Middle Column—Instructional Programs, Products, and Enhancements (i.e., Content)
Right Column—Learning Management Center (Tools)
Left Column Contents
General Information
Update My Registration Information
Register an ISBN or Key Code
Technical Support Information
Product Information
Comments and Suggestions
Right Column Contents
Left Column: General Account and Site Information/Links
General Information
In the top left corner, you will see your Account Name after Welcome. Use this reference to confirm that you are working with the right account. If, for instance, another teacher used the same computer before you and did not log out, his or her name would appear in the upper left column.
Update My Registration Information
Under My Account, you will be able to quickly change or update your current account information. Use this function if you need to change your personal information (e.g., you’ve gotten a new E-mail address and you would like to update it).
- Click the Update My Registration Information link in the left column.You may make the following changes when you select Update Your Registration Information.Update Zip Code or School.
- Update your Personal Information by changing it in the text fields.
Important Note: You will not be able to change your Username after you first register.
Register an ISBN or Key Code
At any point in time, you can easily add another program or product that you’ve purchased or are elgible for by entering a valid Teacher’s Edition ISBN or a Holt Key Code, and then the Submit button.
Click the Learn More link if you would like to learn more about registering Teacher’s Edition ISBNs and/or Holt Key Codes.
You can contact Technical Support for additional help with your Subscriptions Page or for technical support:
Technical Support Information
Web Support: http://www.hmhco.com/support
Email Tech Support
Product Information
If, at any time, you would like to learn about new or additional Holt Products, Programs, Enhancements or Learning Management Tools, please visit our Web site at http://www.hmhco.com/shop.
Comments and Suggestions
We value your input and feedback on our Online Programs, Products, Enhancements and Learning Management Tools. If you would like to provide direct input on the Holt programs and products that you are currently using, please click the Comments and Suggestions link. After doing so, fill in the online form by first selecting your Discipline/Subject Area. Please include the name of the program or product within the text of your comments and suggestions.
We greatly appreciate your feedback!
Middle Column Contents
My Subscriptions: General Information
As you register for Holt McDougal Online Programs, Products, Enhancements, and Tools, you will see the main body of contents change in the Middle Column.
Main Instructional Program(s)
You will see a graphic image of your online program followed by the Name of your Online Program or Product.
You will then have direct access to your online edition by clicking the Online Edition link. If your instructional program is modular, you will have multiple links to access them.
Additional Links Under Your Main Instructional Program(s)
If you, your school, or your district has purchased or is eligible for a supplementary product, component or enhancement, you will also see additional links under your Main Instructional Program.
To access these components, click the applicable links.
You will also see a link to Teacher Support. You can learn more about the instructional opportunities available to you and your students by clicking Teacher Support.
Managing Your Subscriptions
If you have multiple Main Instructional Programs or Products, you will be able to order them according to your preference by clicking the corresponding Up or Down button.
To change the order of modules or sub-components within a Main Instructional Program, click the module or sub-component’s Up or Down button.
Keyword Search Box
If you see a Keyword Search box in the middle column of this page, it means that you can search for resources associated with the Learn It Online codes from your 2010 Holt Literature and Language Arts Student and Teacher's Editions. Type a Learn It Online code and click Search to get started. This option is not available for users created under preview, private individual, Non-US Teacher and for Steck-Vaughn Application.
Right Column Contents
Learning Management Center: General Information
According to your particular program or product—as well as the components that you have purchased or are eligible to receive—you may have a combination of the following Learning Management Components available to you in the Learning Management Center:
Classes and Students —Provides access to Class/Student Manager. This is used to set up your classes as well as Student Accounts and passwords.
Add a Class - To add a new class:
- Click the Add A Class button located in the right column.
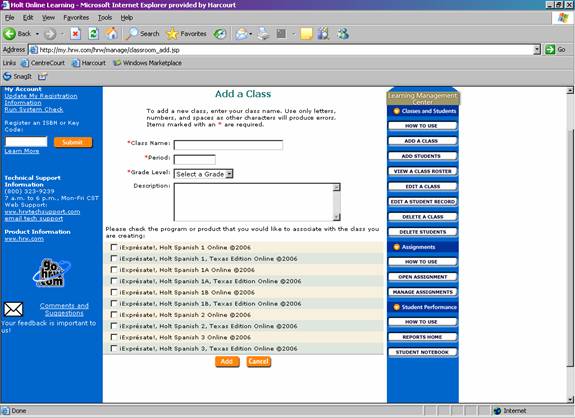
The Add A Class page is displayed:
- In the Class Name box, type in a class name.
- In the Period box, type in the period of the class.
- Select a grade level from the Grade Level drop-down list.
- In the Description box, type in a description of the class (optional).
- Check the programs or products that you would like to associate with the class you are creating.
- Click the Add button.
The Add Students page is displayed: (See the Add Students section.)
Add Student - To add students to a class:
- Click the Add Students button located in the right column.
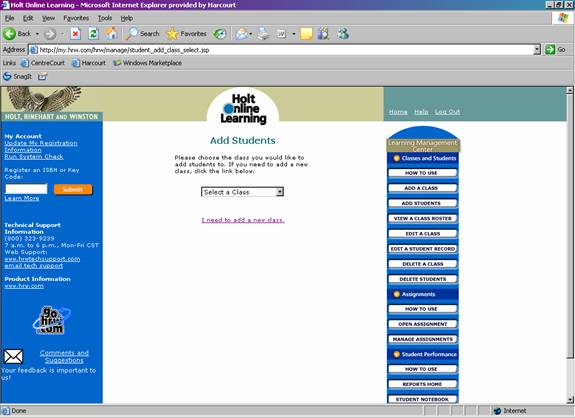
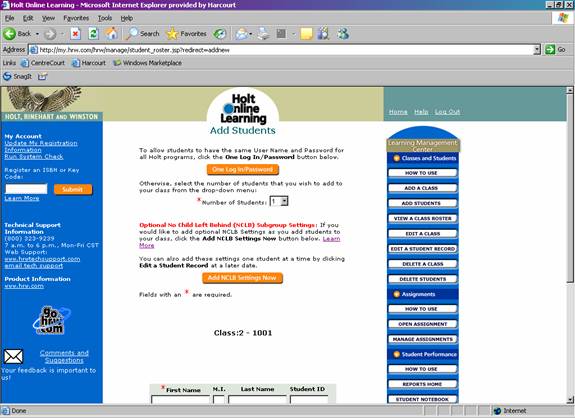
The Add Students page is displayed:
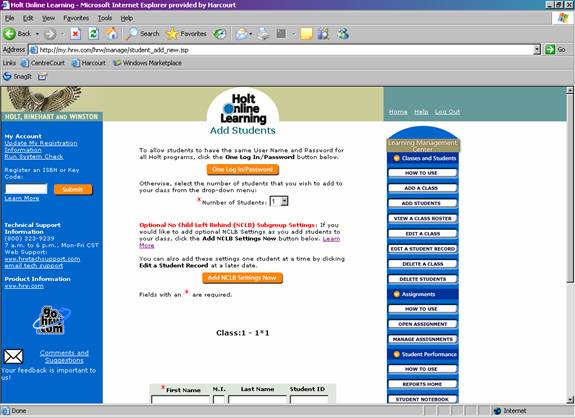
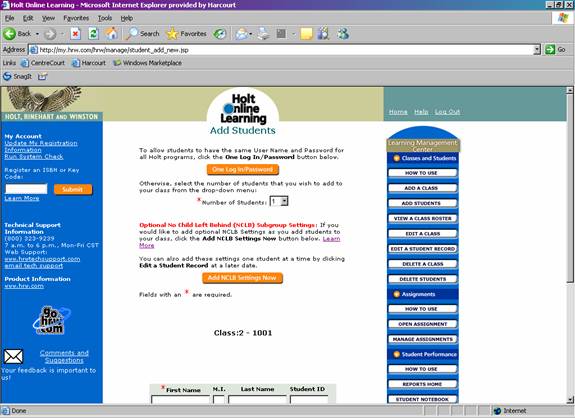
- Select the class you would like to add students to from the Select a Class drop-down list. The Add Students page is displayed:
- Select the “I need to add a new class” link to add a new class (See the Add a Class section.)
- Click the One Log In/Password button to add any existing students that belong to your school, and are registered for another Holt McDougal Online Program, to the class. All these students will have the same username and password for all HOLT programs associated to the class.
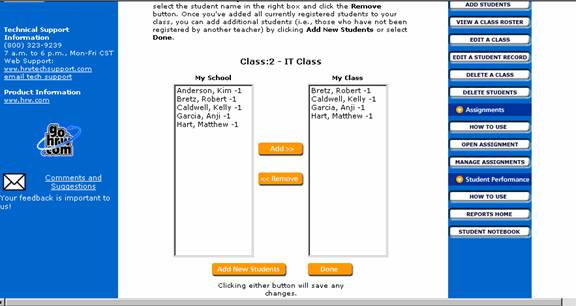
- Click the Add New Students button to save changes and return to the Add Students page.
- Click the Done button to save changes and complete the process of adding students to the selected class.
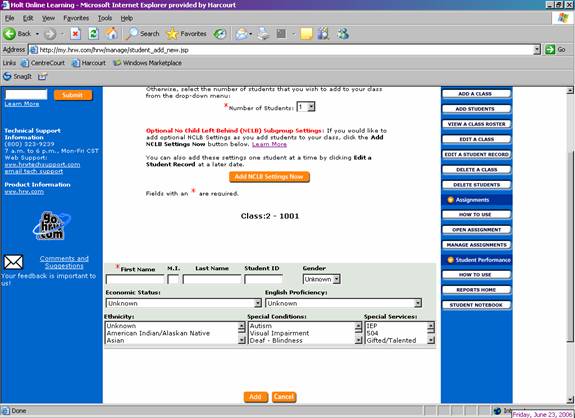
- Select the number of students that you wish to add to your class from the drop-down list. The maximum number of students that can be added at once is 40.
- In the First Name box, type in the student’s first name.
- In the M.I. box, type in the student’s middle initial (optional).
- In the Last Name box, type in the student’s last name (optional).
- In the Student ID Name box, type in the student’s ID (optional).
- Click the Add NCLB Settings Now button to add NCLB Settings as you add students to your class (optional).
- Select the gender of the student from the Gender drop-down list (optional).
- Select the student’s economic status from the Economic Status drop-down list (optional).
- Select the English proficiency of the student from the English Proficiency drop-down list (optional).
- Select the student’s ethnicity from the Ethnicity list box (optional).
- Select the special conditions a student has from the Special Conditions list box (optional).
- Select the special services of a student from the Special Services list box (optional).
- Click the Add button to add students to the class roster.
The View a Class Roster page, for the selected class, is displayed.
View a Class Roster - To view a class roster:
- Click the View a Class Roster button located in the right column.
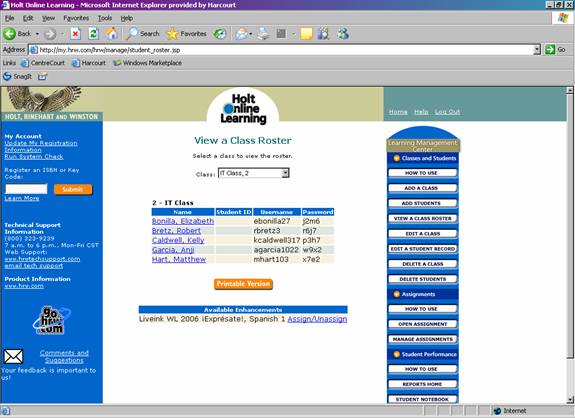
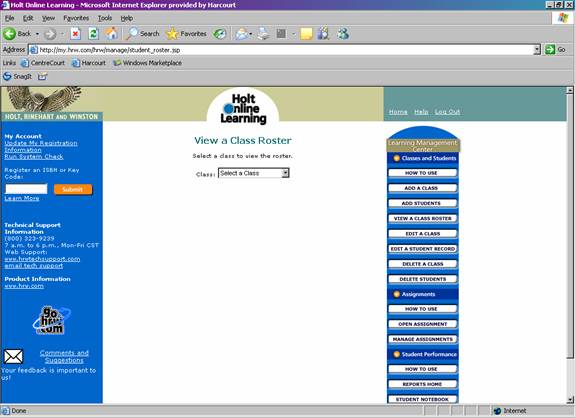
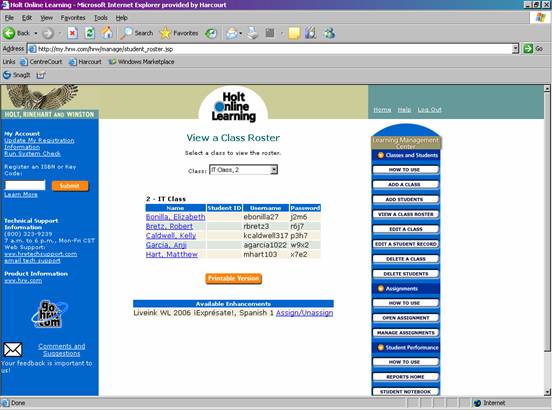
The View a Class Roster page is displayed:
- Select a class from the drop-down list to view the roster.
- Click the Printable Version button (optional)
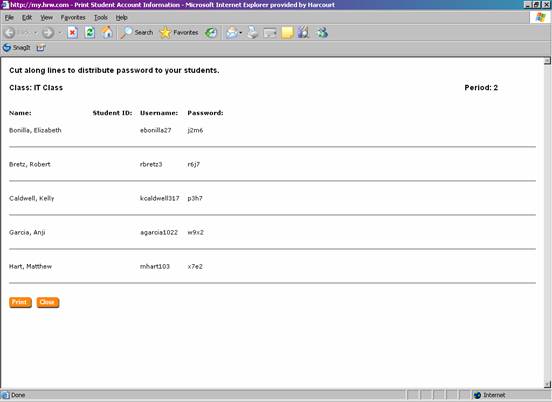
The Student Account Information, printable version, page is displayed:
- Click the Print button to print the Student Account Information.
- Select the Close button to return to the selected class roster.
Edit a Class - To edit a class:
- Click the Edit a Class button located in the right column.
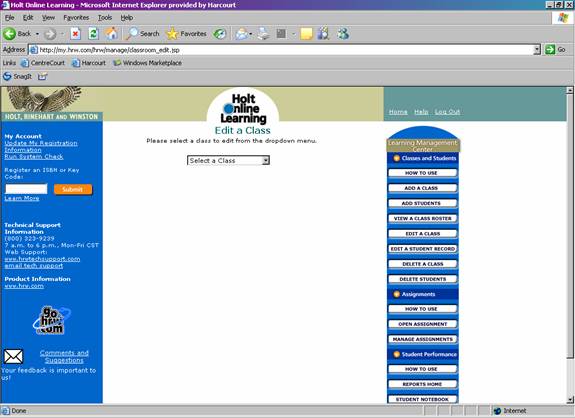
The Edit a Class page is displayed:
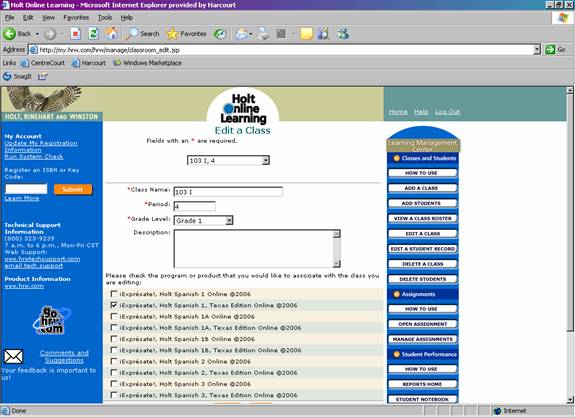
- Select a class from the drop-down list to edit a class.
- In the Class Name box, type in a class name.
- In the Period box, type in the period of the class.
- Select a grade level from the Grade Level drop-down list.
- In the Description box, type in a description of the class (optional).
- Check the programs or products that you would like to associate with the class you are editing (optional).
- Select the Submit button when changes are complete.
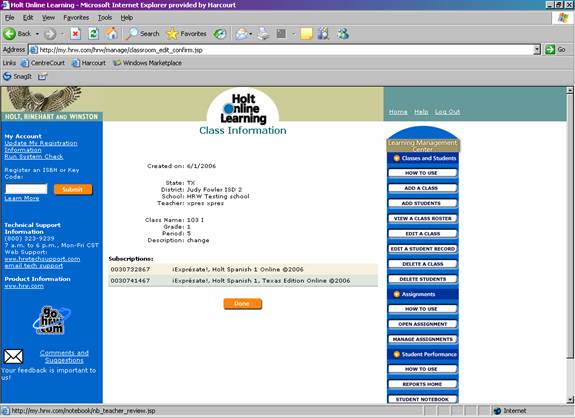
The Class Information page is displayed.
Edit a Student Record - To edit a student record:
- Click the Edit a Student Record button located in the right column.
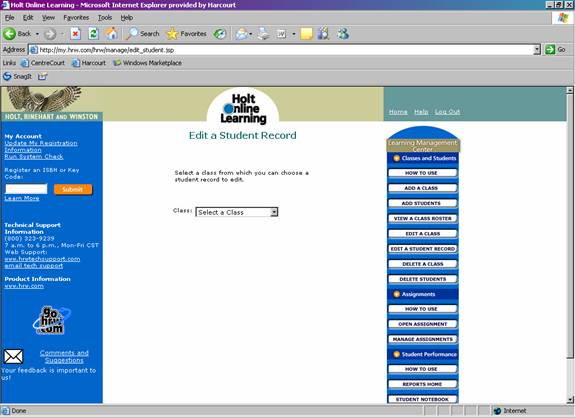
The Edit a Student Record page is displayed:
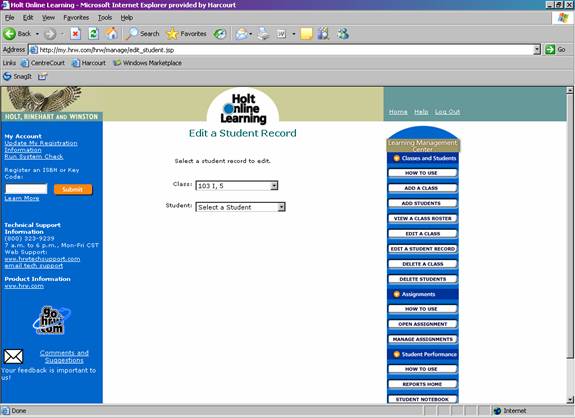
- Select a class from the drop-down list from which you can choose a student record to edit.
- Select a student from the drop-down list.
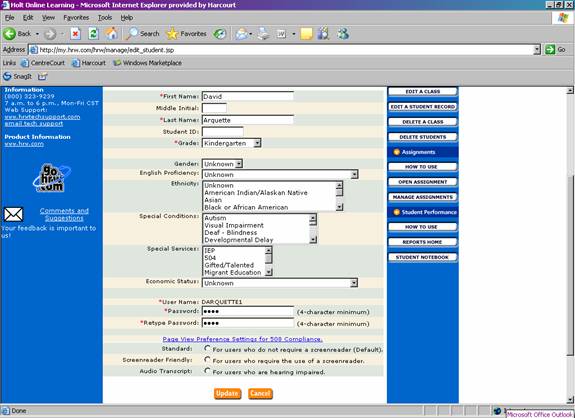
- In the First Name box, type in the student’s first name.
- In the M.I. box, type in the student’s middle initial (optional).
- In the Last Name box, type in the student’s last name (optional).
- In the Student ID Name box, type in the student’s ID (optional).
- Select the grade the student belongs to from the Grade drop-down list.
- Select the gender of the student from the Gender drop-down list (optional).
- Select the English proficiency of the student from the English Proficiency drop-down list (optional).
- Select the student’s ethnicity from the Ethnicity list box (optional).
- Select the special conditions a student has from the Special Conditions list box (optional).
- Select the special services of a student from the Special Services list box (optional).
- Select the student’s economic status from the Economic Status drop-down list (optional).
- Username cannot be edited.
- In the Password box, type in a password. The password has to be at least 5 characters.
- In the Retype Password box, retype your password.
- Select the page view (optional).
- Click the Update button to save the changes made for the selected student .
The View a Class Roster page is displayed.
Delete a Class - To delete a class:
- Click the Delete a Class button located in the right column.
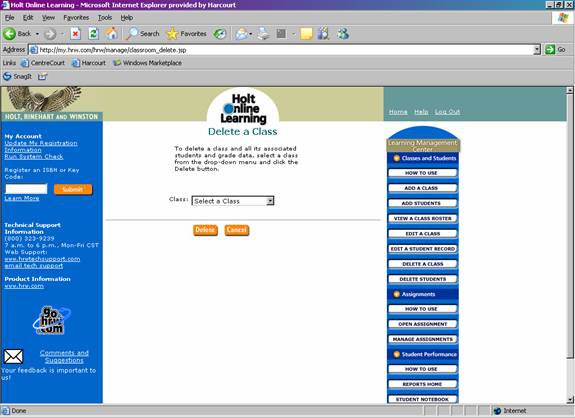
The Delete a Class page is displayed:
- Select a class from the drop-down list.
- Click the Delete button to delete the selected class and all its associated students and grade data.
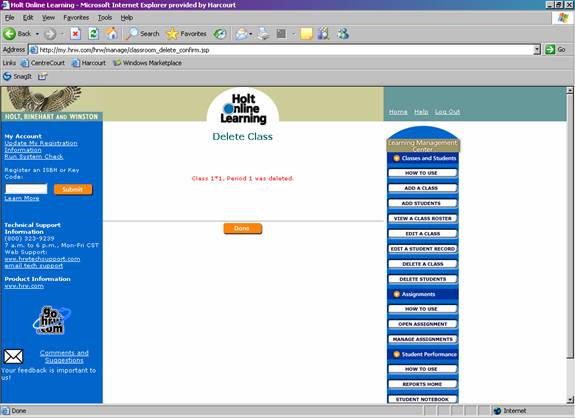
The Delete Class page is displayed:
- Click the Done button to return to the hub page.
Delete Students - To delete a student from a class:
- Click the Delete Students button located in the right column.
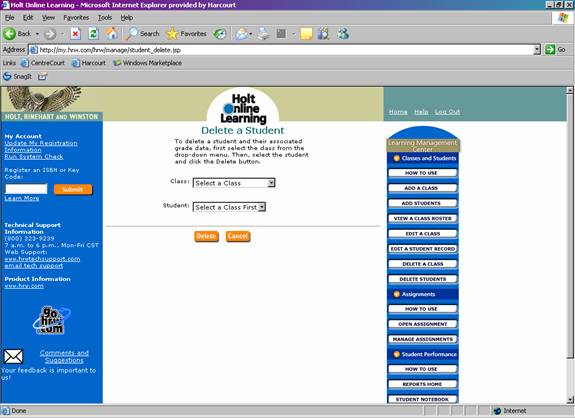
The Delete a Student page is displayed:
- Select a class from the drop-down list.
- Then select a student from the drop-down list.
- Click the Delete button to delete the selected student and their associated grade data from the selected class.
The View a Class Roster page, for the selected class, is displayed.Assignments—Provides access to the Assignment Manager; used by Teachers to assign specific Holt resources, State Standards Tests, and Teacher-created Test Generator Tests for either assessment or practice. To begin using the Assignment Manager, select the How to Use link.
Student Performance—Provides access to Student Performance Manager (Under Construction); allows teachers to view and generate Student/Class/NCLB Performance Reports; also allows Teachers to review and evaluate Students’ Notebook exercises and writing if available in your Main Instructional Programs. To begin using Student Performance Manager, select the How to Use link.
Tools—Provides access to tools such as the Teacher Home Page Builder (Under Construction: to be released this Fall!)
